How to open Computer Management in Windows 11/10
In this post, we will show you how to open Computer Management on a Windows 11/10 PC. Computer Management is a powerful application that allows you to access a variety of administrative tools from a single interface, including Task Scheduler, Event Viewer, Device Manager, Windows Services Manager, and more. The tool is primarily designed for system administrators and advanced users, but with some technical knowledge and administrative privileges, you can effectively use Computer Management to monitor various aspects of your system, manage system resources, diagnose and troubleshoot issues, and perform other basic operations.
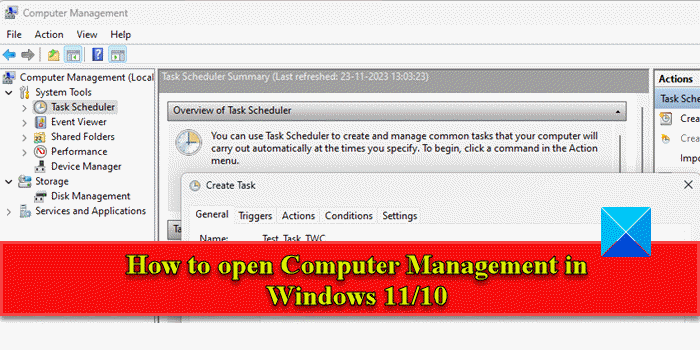
To use Computer Management, you should know how to open it on a Windows 11/10 PC. Interestingly, there are multiple ways to open the tool. In this post, we will take a detailed look at them so that you can choose the one that is most accessible and convenient for you. Knowing alternative methods also helps during troubleshooting and ensures the tool can be accessed whenever needed.
How to open Computer Management in Windows 11/10
Here are the various methods of opening Computer Management on a Windows 11/10 PC:
- Use Windows Search
- Use the Power User menu
- Use File Explorer
- Use Command Prompt/PowerShell/Windows Terminal
- Use the Run command
- Use Start menu
- Use Control Panel
- Use a Desktop Shortcut
- Use Task Manager
Let us have a look at them one by one.
1] Use Windows Search
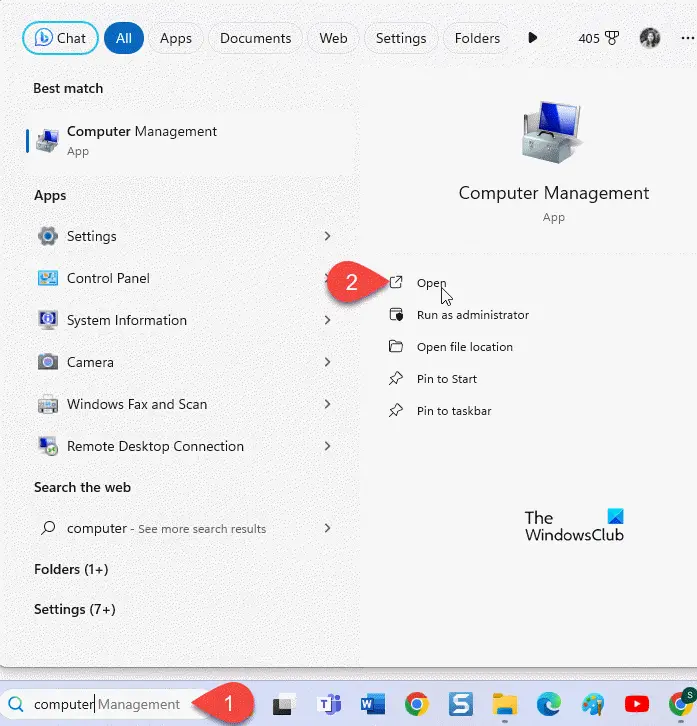
Windows Search allows you to quickly find files, programs, emails, and other items on your system.
To open Computer Management using Windows Search, place your cursor in the search box on the left side of the taskbar and type ‘computer’. Computer Management will show up in search results. Click ‘Open‘ or ‘Run as administrator’ on the right panel.
2] Use the Power User menu
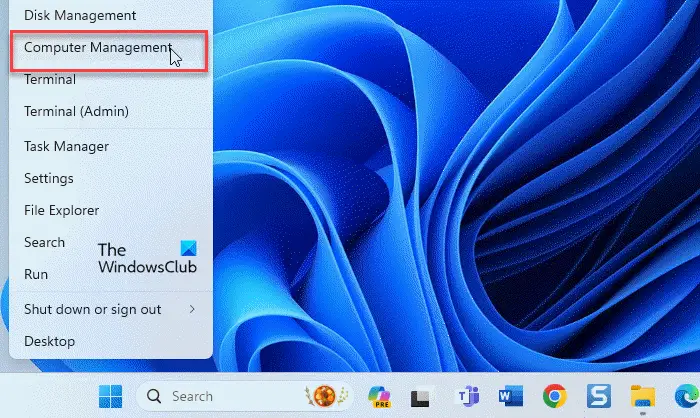
Power User menu, also known as the WinX (Win+X) menu offers another convenient way to open Computer Management.
Right-click on the Start button icon. A menu will appear. Click on Computer Management. The app will open on your computer screen.
3] Use File Explorer
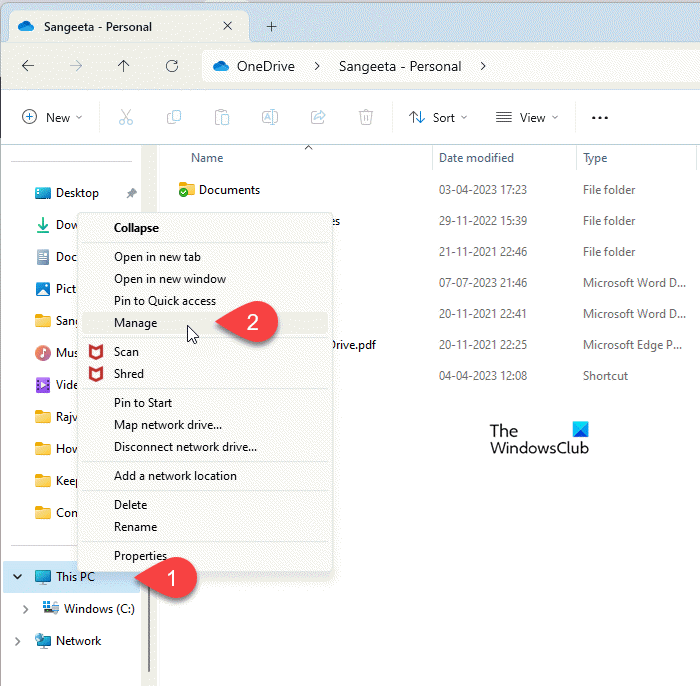
You can use File Explorer in two different ways to open Computer Management.
First, open the File Explorer window (click on the Folder icon in your taskbar) and navigate to This PC in the left panel. Right-click and select Manage (or right-click > Show more options > Manage).
Second, open file Explorer and type compmgmt.msc in the address bar on top. Press the Enter key to open Computer Management.
The second method navigates you to the physical location of the Computer Management file, which is C:\Windows\System32\compmgmt.msc. You can try this method if you’re not able to open Computer Management using other methods.
4] Use Command Prompt/PowerShell/Windows Terminal

To open Computer Management using Command Prompt or PowerShell or Windows Terminal, launch the command line tool you prefer.
To open Command Prompt, press Win+R, type cmd in the Run dialogue box, and press Enter. To open PowerShell or Windows Terminal, press Win+X followed by I.
Once the app runs, execute the following command:
compmgmt.msc
The above command will open Computer Management on your Windows 11/10 PC.
5] Use the Run command
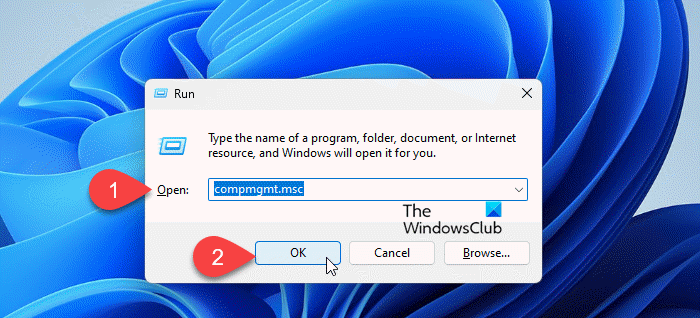
The Run dialogue box offers a quick way to open programs and system tools without navigating through menus.
To open Computer Management using the Run dialog box, press Win+R, type compmgmt.msc in the Run dialogue box, and press Enter.
6] Use Start menu
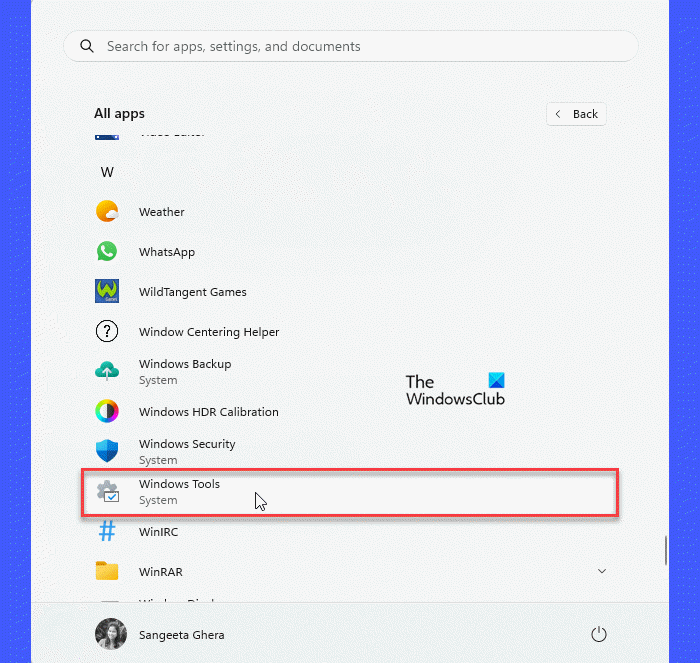
Start menu is a central hub that provides access to various features, settings, and applications on your system.
To open Computer Management using the Start menu, click on the Start button in the taskbar or press the Windows key. Then click on All apps button in the top-right corner. Navigate to the Windows Tools option in the list of apps and click on it. A window will appear. Double-click on Computer Management to open the app.
Note: Administrative Tools has been renamed into Windows Tools in Windows 11. If you’re using Windows 10, you’ll have to open the Windows Administrative Tools folder to open Computer Management.
7] Use Control Panel
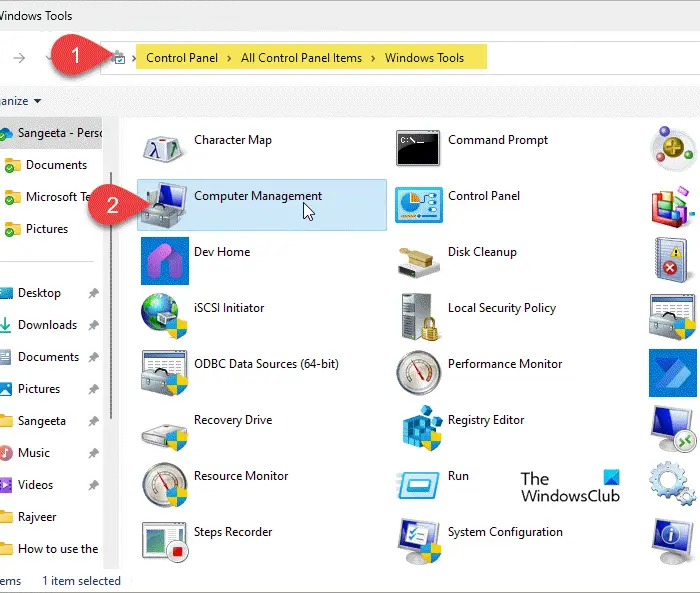
Another method of opening Computer Management is using the Control Panel.
Press Win+R, type control in the Run dialogue box, and hit Enter. The Control Panel window will appear. Navigate to System and Security > Windows Tools/Administrative Tools. Double-click on Computer Management to open it on your Windows PC.
8] Use a Desktop Shortcut
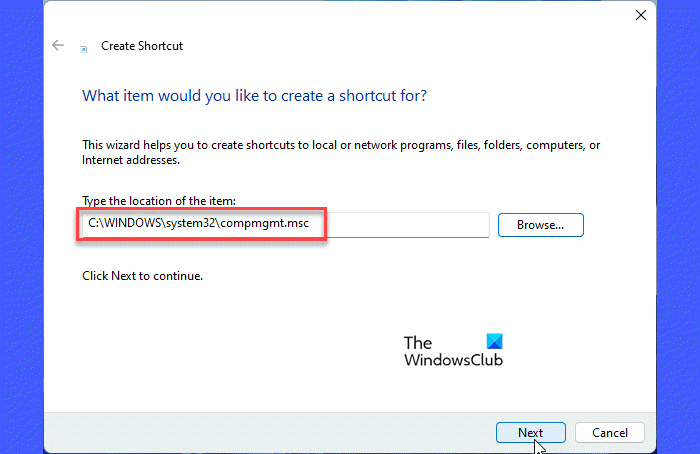
You may create a desktop shortcut for Computer Management to run the app quickly from your desktop.
Right-click anywhere in the empty area on your desktop and select New > Shortcut. Create Shortcut window will appear. Type C:\WINDOWS\system32\compmgmt.msc or simply compmgmt.msc in the Type the location of the item field and click on the Next button. Type Computer Management in the Type a name for this shortcut field and click on the Finish button. The app’s icon will appear on your desktop. Double-click on the icon to open the app.
9] Use Task Manager
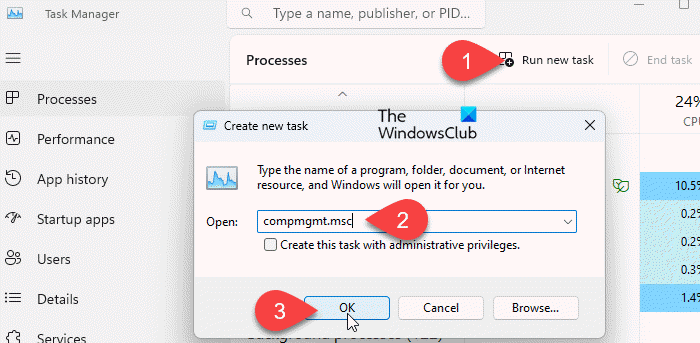
You can also open Computer Management using the Task Manager app in Windows.
Open Task Manager and click on the Run new task button on top. Type compmgmt.msc in the Create new task window and hit Enter.
I hope you find this useful.
Read: Computer Management not opening or responding in Windows.
How to disable computer management in group policy?
To Disable Computer Management MMC Snap-in via group policy, open the Group Policy Editor by pressing Win+R and typing gpedit.msc in the Run dialogue box. In the Group Policy Editor window, navigate to User Configuration > Administrative Templates > Windows Components > Microsoft Management Console > Restricted/Permitted snap-ins in the left panel. Double-click on Computer Management in the right panel. In the Computer Management properties window, select Disabled and click on Apply > OK. Close the Group Policy Editor and reboot your PC to apply the changes.
Read: How to open Disk Management in Windows.
How do I access MMC in Windows 11?
To open MMC or Microsoft Management Console, press Win+R and type mmc in the Run dialogue box. Press Enter and select Yes in the User Account Control prompt. Alternatively, you can use Command Prompt or Windows PowerShell to access MMC in Windows 11. Press Win+X to open the Power User menu. Select Terminal (Admin). Select Yes in the UAC prompt. Type mmc in the PowerShell window and press the Enter key.
Related: Local Users and Groups is missing from Computer Management.
#open #Computer #Management #Windows
